
You’ve seen hundreds of videos like mine, but nobody explains how they’re made. In the reel I told you in one minute; here is the full version: which tool does what, in which order, the mistakes that cost me, and the whole skill for you to copy, along with a prompt that understands it and helps you adapt it to your channel.
The core idea is simple: I don’t edit videos, I write rules. I give Claude Code one sentence, it reads my rules and does the heavy lifting. I pick the story, review and correct. And every correction becomes a new rule.
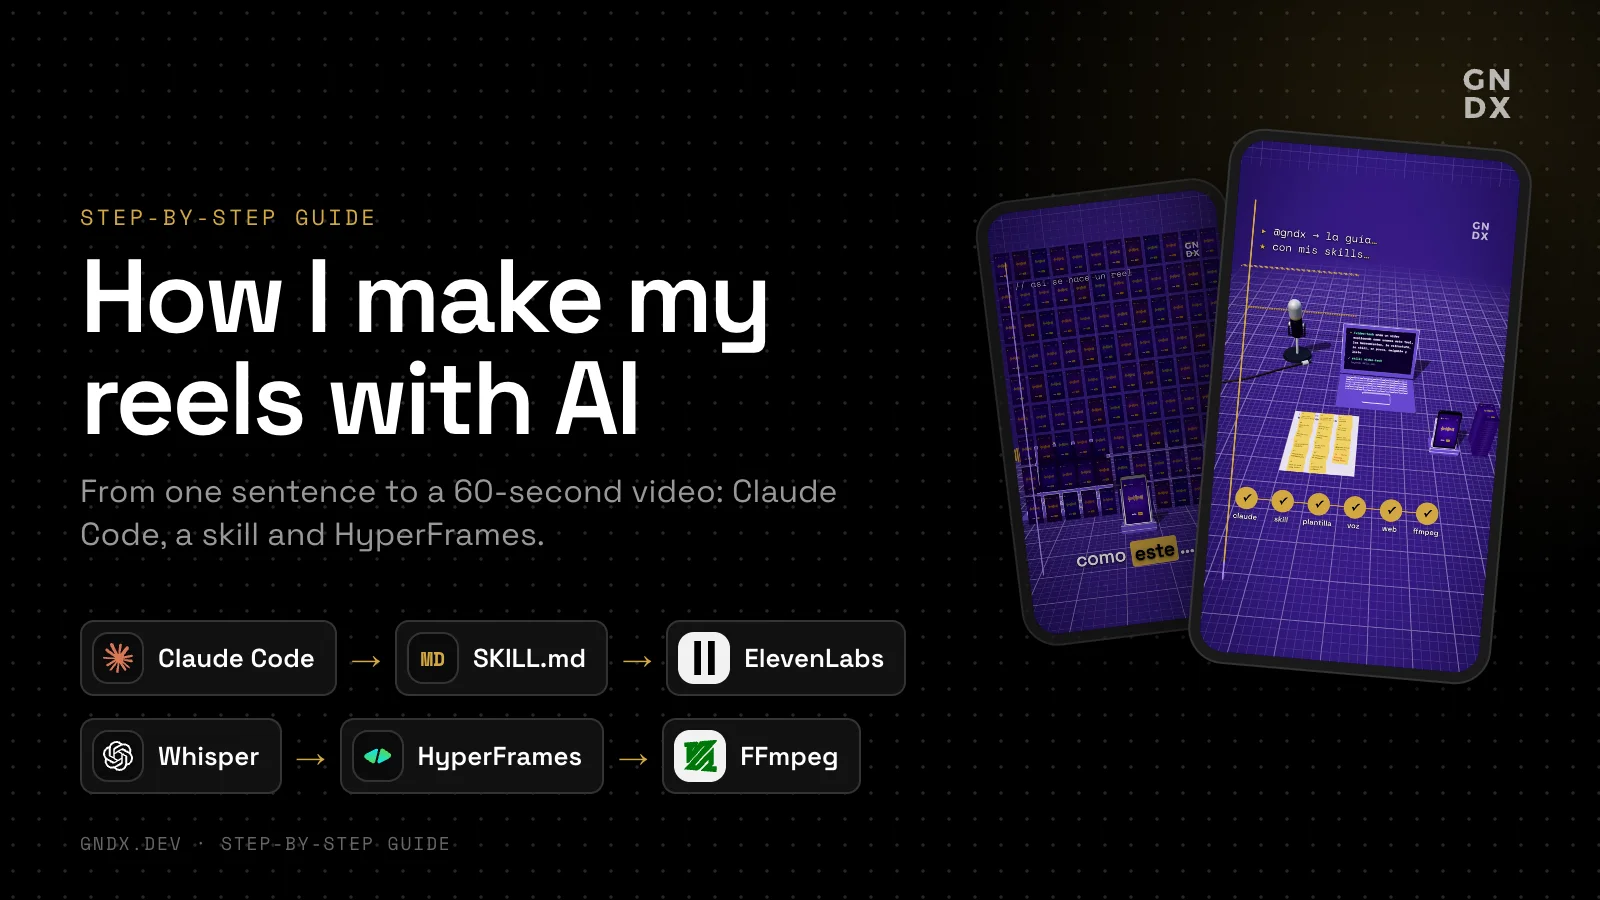
What you need
| Tool | What it does | Notes |
|---|---|---|
| Claude Code | The agent that does all the work | Runs in your terminal, inside the project folder |
A skill (SKILL.md) | Your rules: channel, style, voice, steps | Lives in ~/.claude/skills/<name>/SKILL.md |
| HyperFrames | Turns HTML into video | Open source (HeyGen). Needs Node.js 22+, FFmpeg and Chrome. Run it with npx hyperframes |
| ElevenLabs | Text → speech | A premade voice or your cloned voice. The API key goes only in an environment variable |
| Whisper | Speech → text, to check | The small model, running locally (I use faster-whisper) |
| FFmpeg | Joins, measures and adjusts the audio | Loudness, peaks and black frames |
| Three.js | The 3D world (optional) | Ships inside the project |
I also use licensed music (Epidemic Sound) and a project template I built reel by reel. If you don’t have a template, that’s fine: Claude Code creates it with you on your first video.
Step 1 · It all starts with one sentence
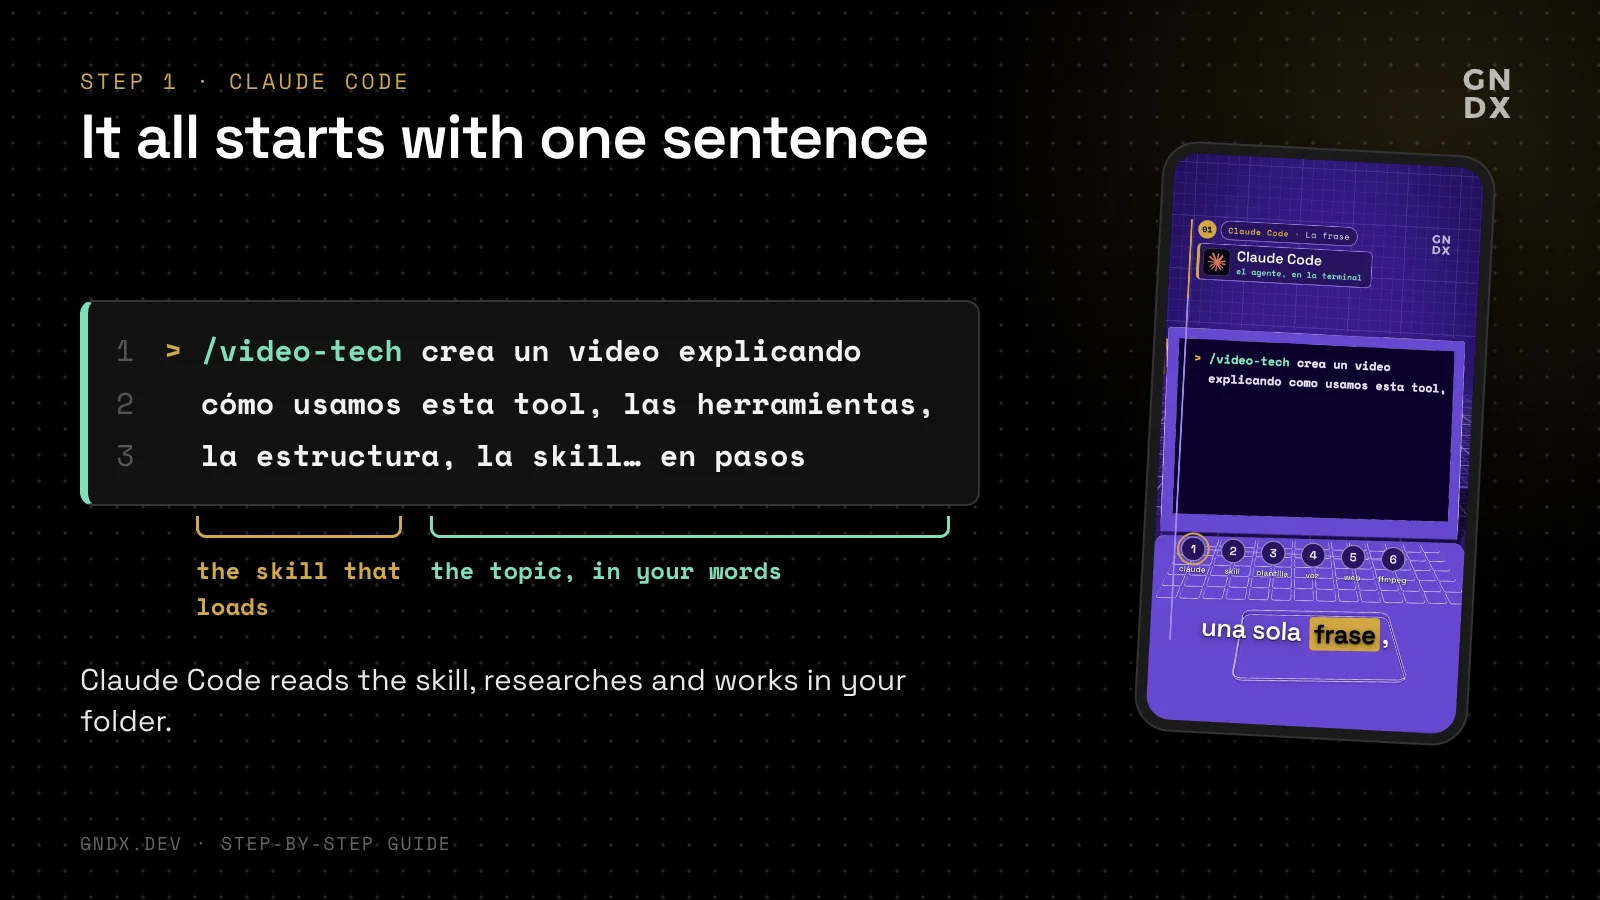
I open Claude Code in my videos folder and type the skill name followed by the topic, in my own words (I write in Spanish):
/video-tech crea un video explicando cómo usamos esta tool, las herramientas, la estructura, la skill… en pasos, amigable y listo/video-tech loads the skill; the rest is the brief. You don’t need a perfect prompt: the rules already live in the skill. That’s the whole point.
Step 2 · The skill: one file with all your rules
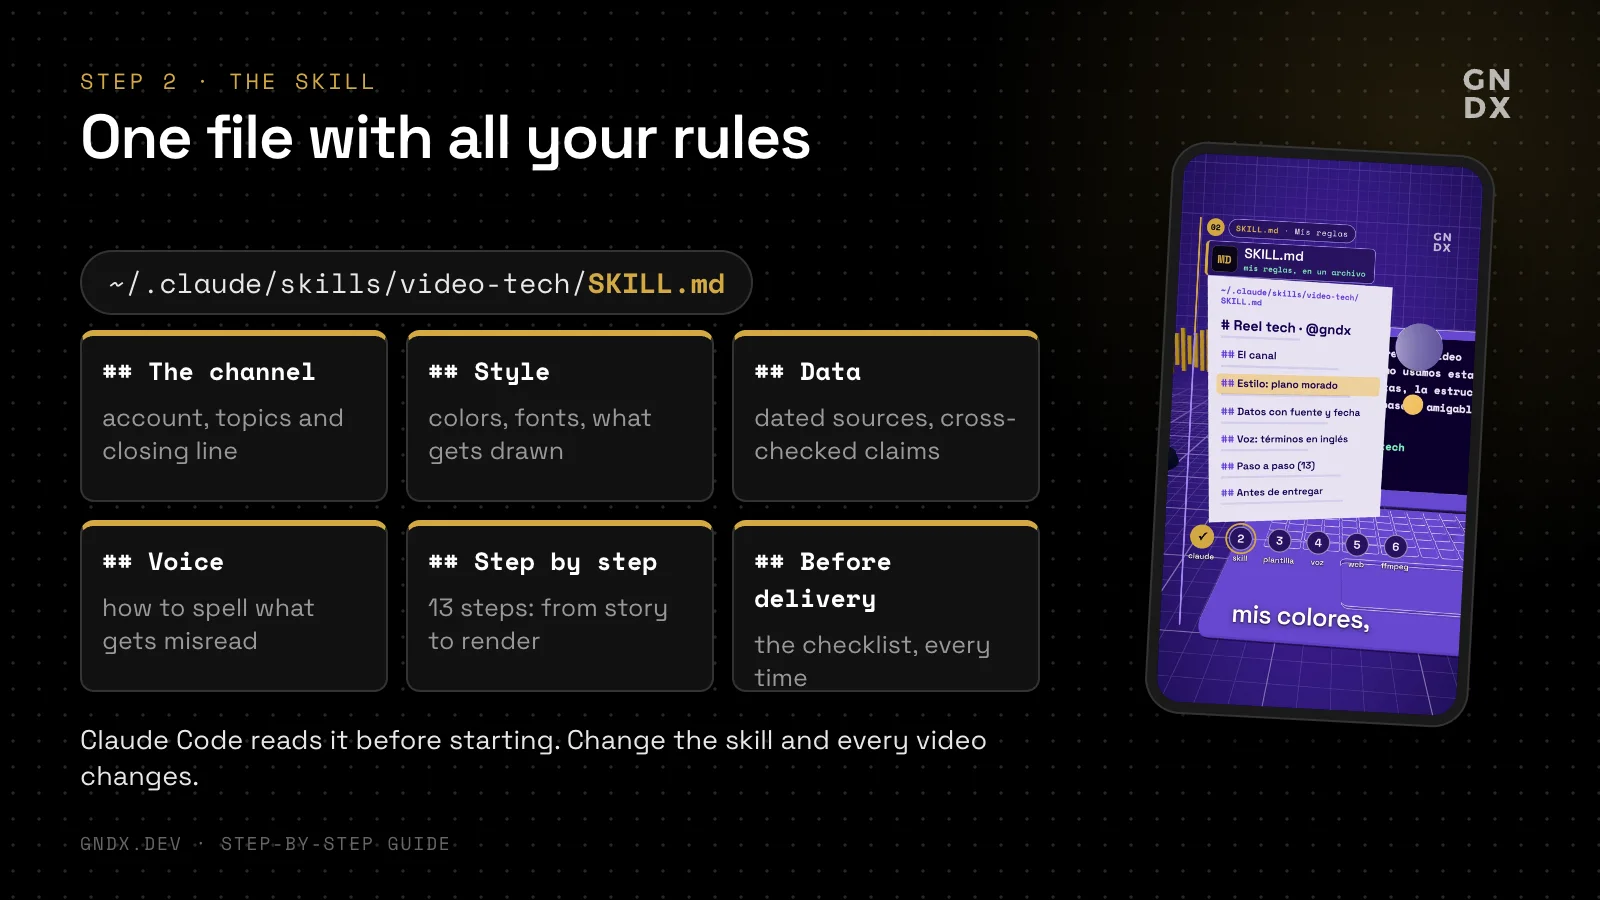
A skill is a Markdown file with a header (name and description) and your instructions. Claude Code reads it before starting, so change the skill and every video changes. Mine has six blocks:
- The channel: the account, the topics, the tone and the closing line.
- Style: colors, fonts, what gets drawn and what is “real”, and the Instagram safe zone.
- Data: primary sources only, with dates; superlatives get cross-checked.
- Voice: which voice, how fast, and how to spell the words it misreads.
- Step by step: 13 steps, from story to render.
- Before delivery: the checklist that runs every time.
At the end of this article you’ll find a full version, ready to copy and customize.
Step 3 · A template and three stories
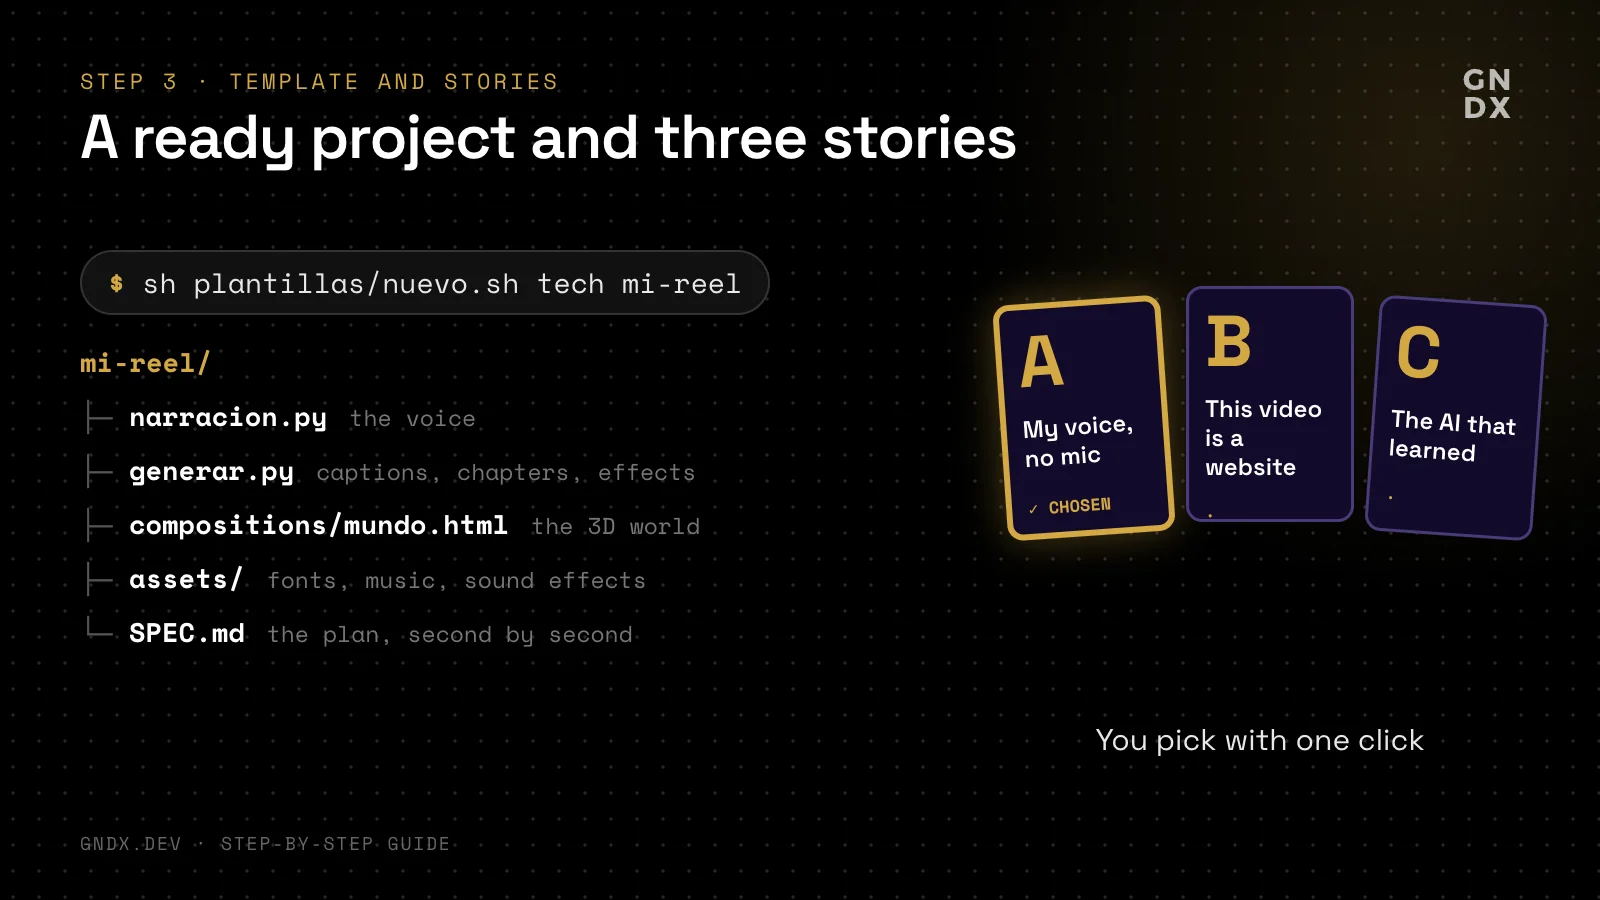
Claude Code researches the topic and sets up the project from my template with a single command:
sh plantillas/nuevo.sh tech mi-reelThe template brings everything that repeats in every reel: the voice script, the captions and chapters generator, the 3D world, fonts, music and sound effects. It also creates a mockup: it estimates the voice timing from the text, so the whole reel plays without spending a single ElevenLabs character.
Then it proposes three different stories, each with a second-by-second outline and the facts already checked. I pick one with a click. They all follow the same structure, the one that has worked best for me:
- Hook in the first 3 seconds: a surprising question about what you’re seeing.
- A short promise: “I’ll tell you in one minute”.
- Chapters of 4 to 6 seconds that turn: “but…”, “until…”.
- One fact with a number.
- A payoff that calls back to the hook.
- A closing that asks for the follow.
Step 4 · The voice, in a single take
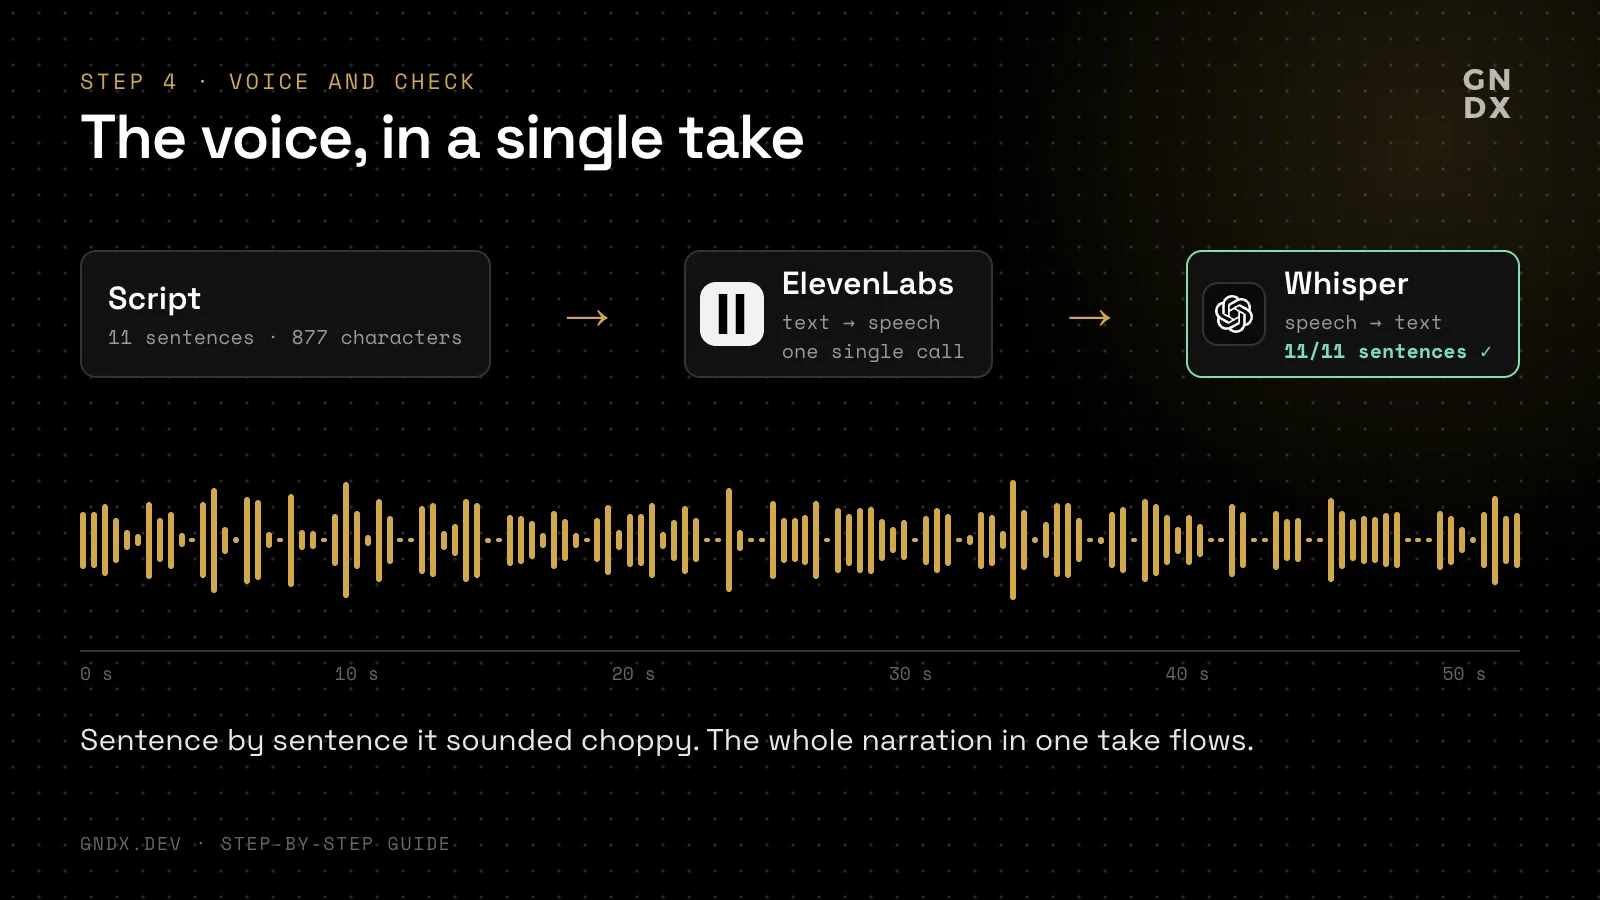
Claude Code writes the script (about 150 words for 60 seconds) and ElevenLabs gives it a voice. The waveform in the image is the real one: the loudness of this reel’s voice, sentence by sentence.
This is where I learned the most expensive lesson: at first I generated the voice sentence by sentence and left gaps between them so the animations could “breathe”. It sounded choppy. Now the whole script goes in a single call and is then cut at the silences, only to know when each word starts. The voice flows and the captions still go word by word.
Then Whisper listens to each sentence and compares it with the script. If a word comes out wrong, you spell it the way it sounds: to make the Spanish voice say “FFmpeg” properly, the script reads “efe efe eme peg” (the screen shows the correct spelling).
🔐 The ElevenLabs key goes only in the
ELEVENLABS_API_KEYvariable. Never in a project file, never in the chat.
Step 5 · The video is a web page
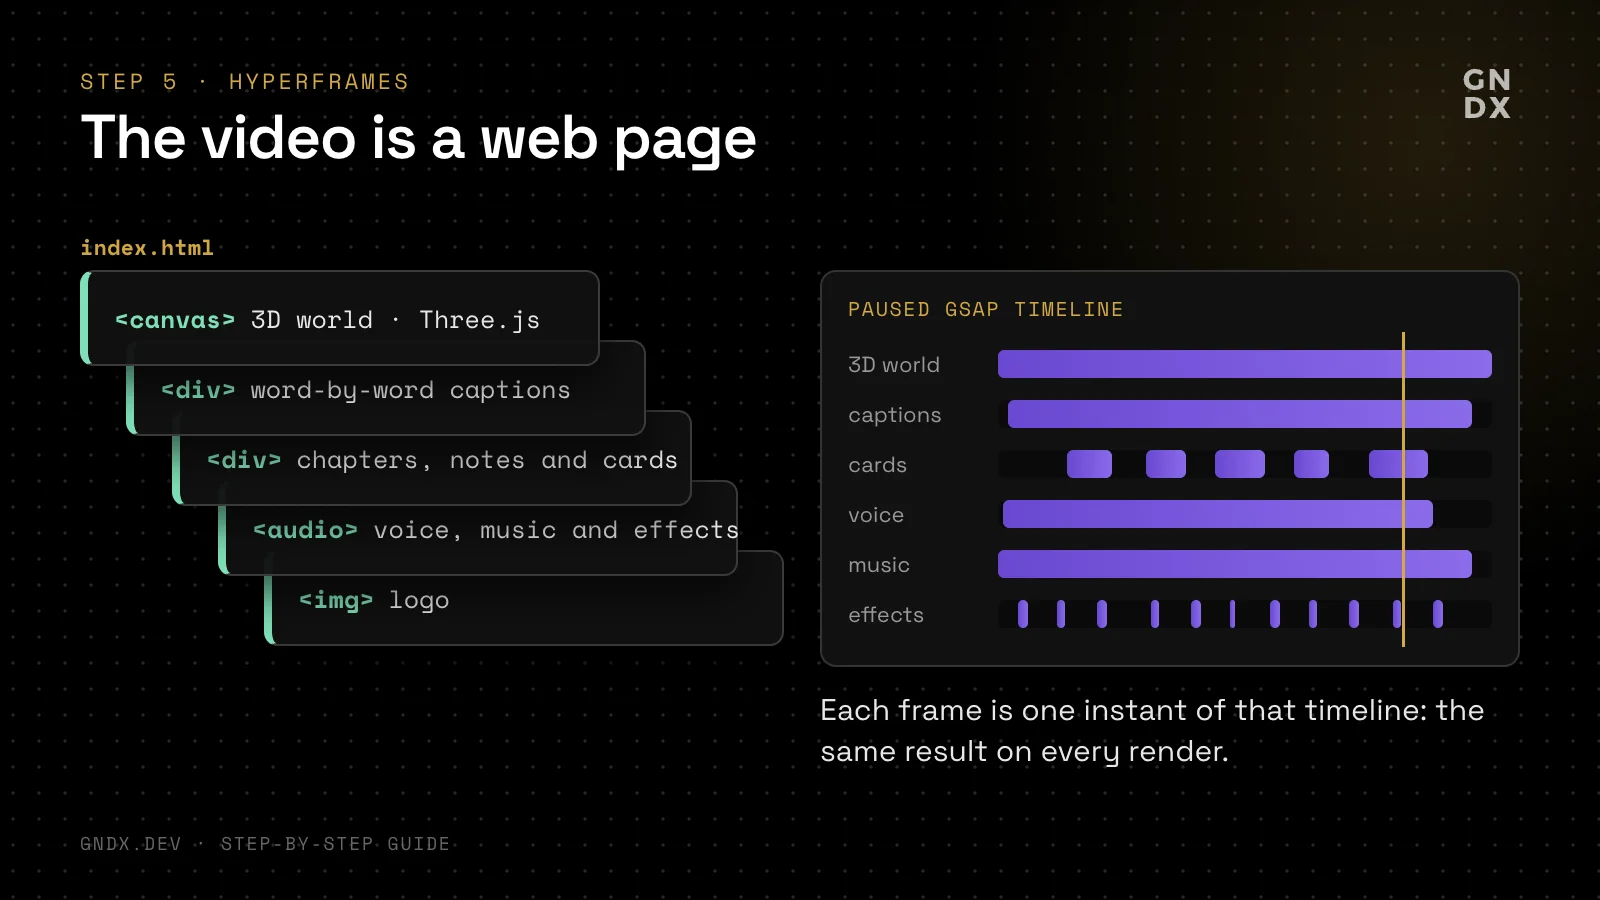
This is the trick that surprises people the most: every reel is a web page. HyperFrames takes an index.html with layers (the 3D world in a <canvas> with Three.js, the captions, the chapters, the cards, the audio) and a paused GSAP timeline. Each frame is one exact instant of that timeline, so the result is identical on every render.
Before rendering I check two things:
npx hyperframes check        # errors, contrast, text that disappears too fast
npx hyperframes preview      # the preview in the browser
I also lay the Instagram safe zone over captures from several seconds: the header covers the top, the buttons the right side and the post text the bottom. Everything important goes in x 100–980 and y 222–1660 (and left of x 900 below y 1280). Those numbers come from a published reel, not from a guide.
Step 6 · 1,800 photos that become an MP4
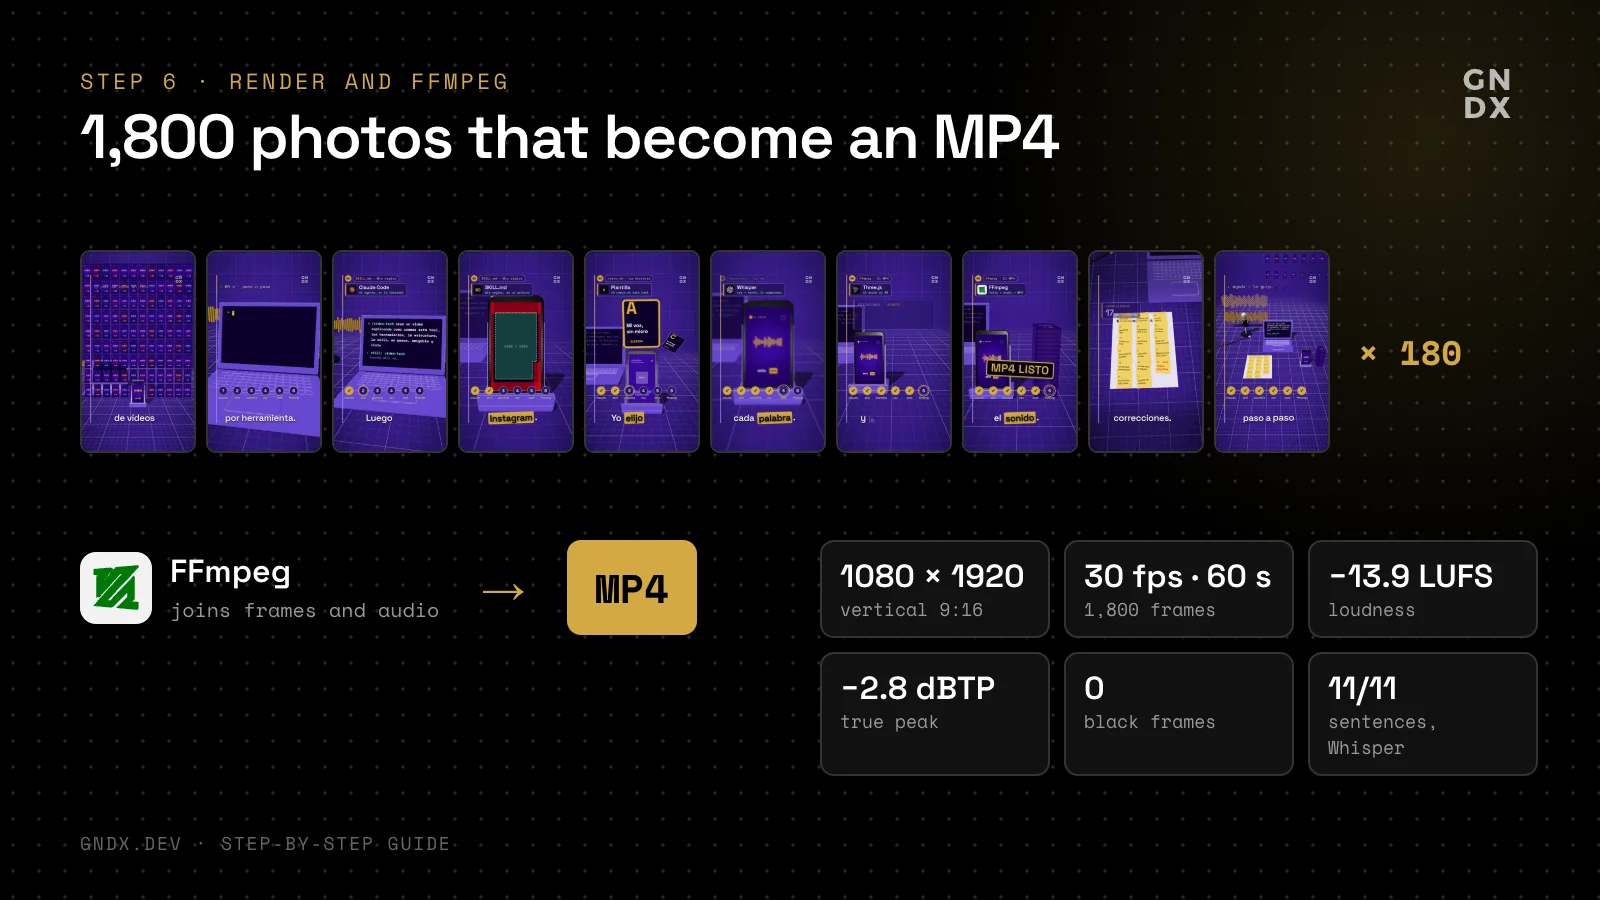
HyperFrames freezes the page and photographs it 1,800 times (60 seconds at 30 fps). FFmpeg joins the photos and the audio into an MP4, and then I use it to measure:
npx hyperframes render -q delivery -o renders/mi-reel.mp4
ffmpeg -i renders/mi-reel.mp4 -filter_complex ebur128=peak=true -f null -   # loudness and true peak
ffmpeg -i renders/mi-reel.mp4 -vf blackdetect=d=0.05 -an -f null -          # black frames
My targets: between −13 and −14 LUFS, true peak below −2 dBTP, no black frames, and Whisper understanding every sentence on the final mix. The reel for this guide came out at −13.9 LUFS and −2.8 dBTP, with no mastering.
Step 7 · Every mistake becomes a rule
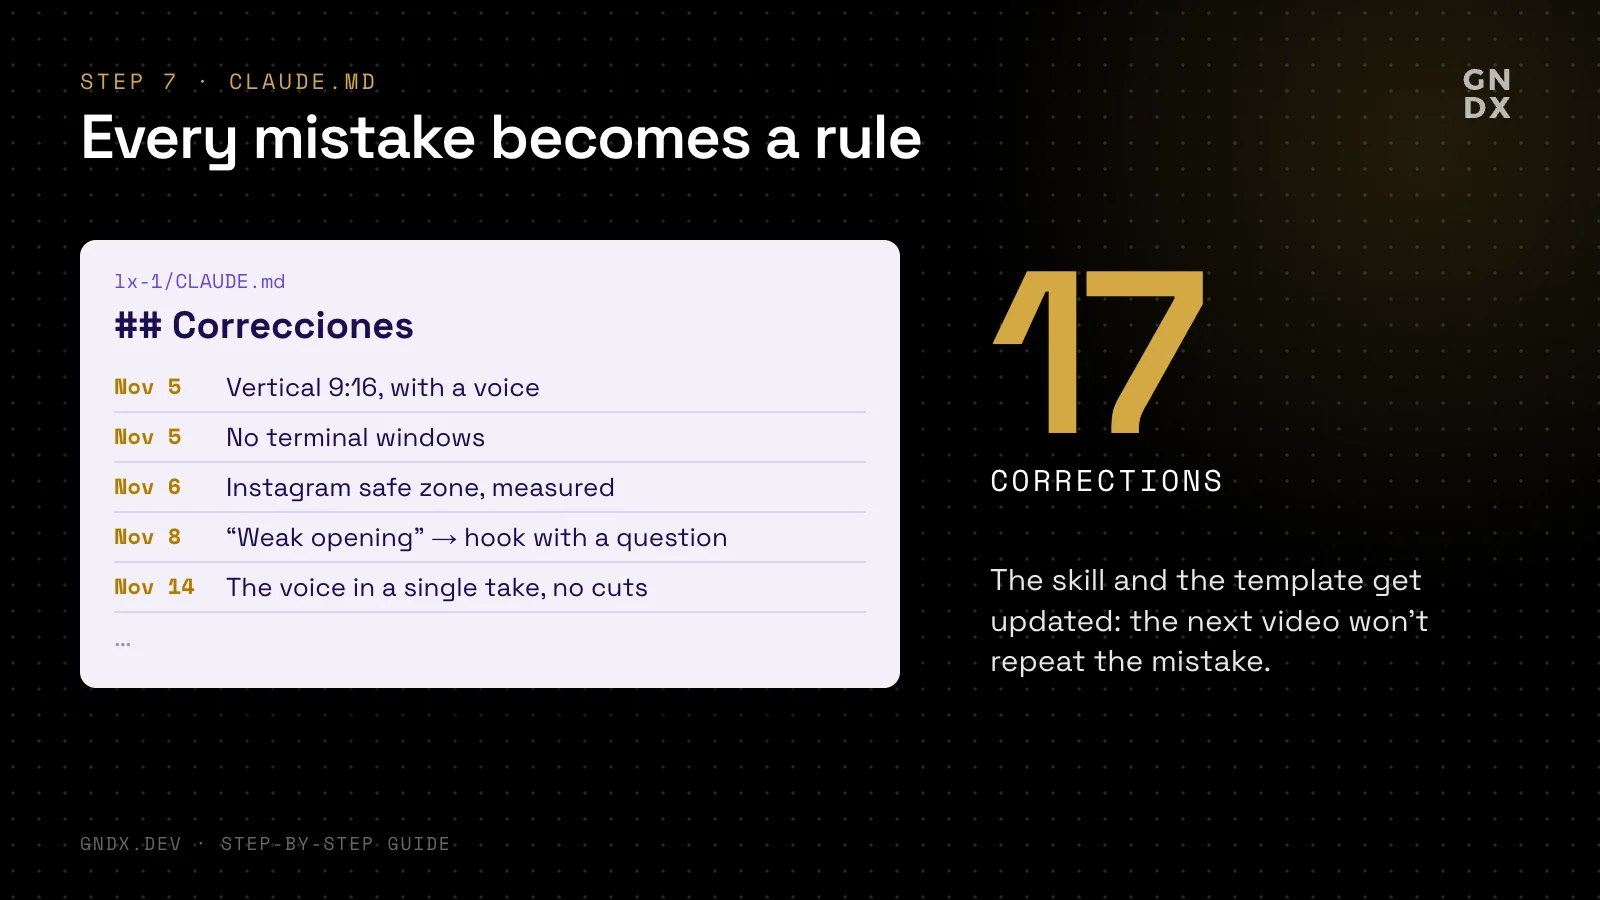
This is the part that makes the system improve. The project’s CLAUDE.md has a “Corrections” section: every time I correct something, Claude Code writes it down with the date and the rule exactly as I said it, before moving on. If it applies forever, it also updates the skill or the template.
There are 17 so far. A few of them:
- The first video came out horizontal and silent → vertical 9:16 with narration.
- The logo sat under Instagram’s header → a measured safe zone.
- “Your opening is weak” → the hook is a surprising question, with something big on screen on that word.
- The voice sounded choppy → a single take.
The next video doesn’t repeat the mistake. That’s why every reel costs me less than the one before.
The full skill (copy it and make it yours)
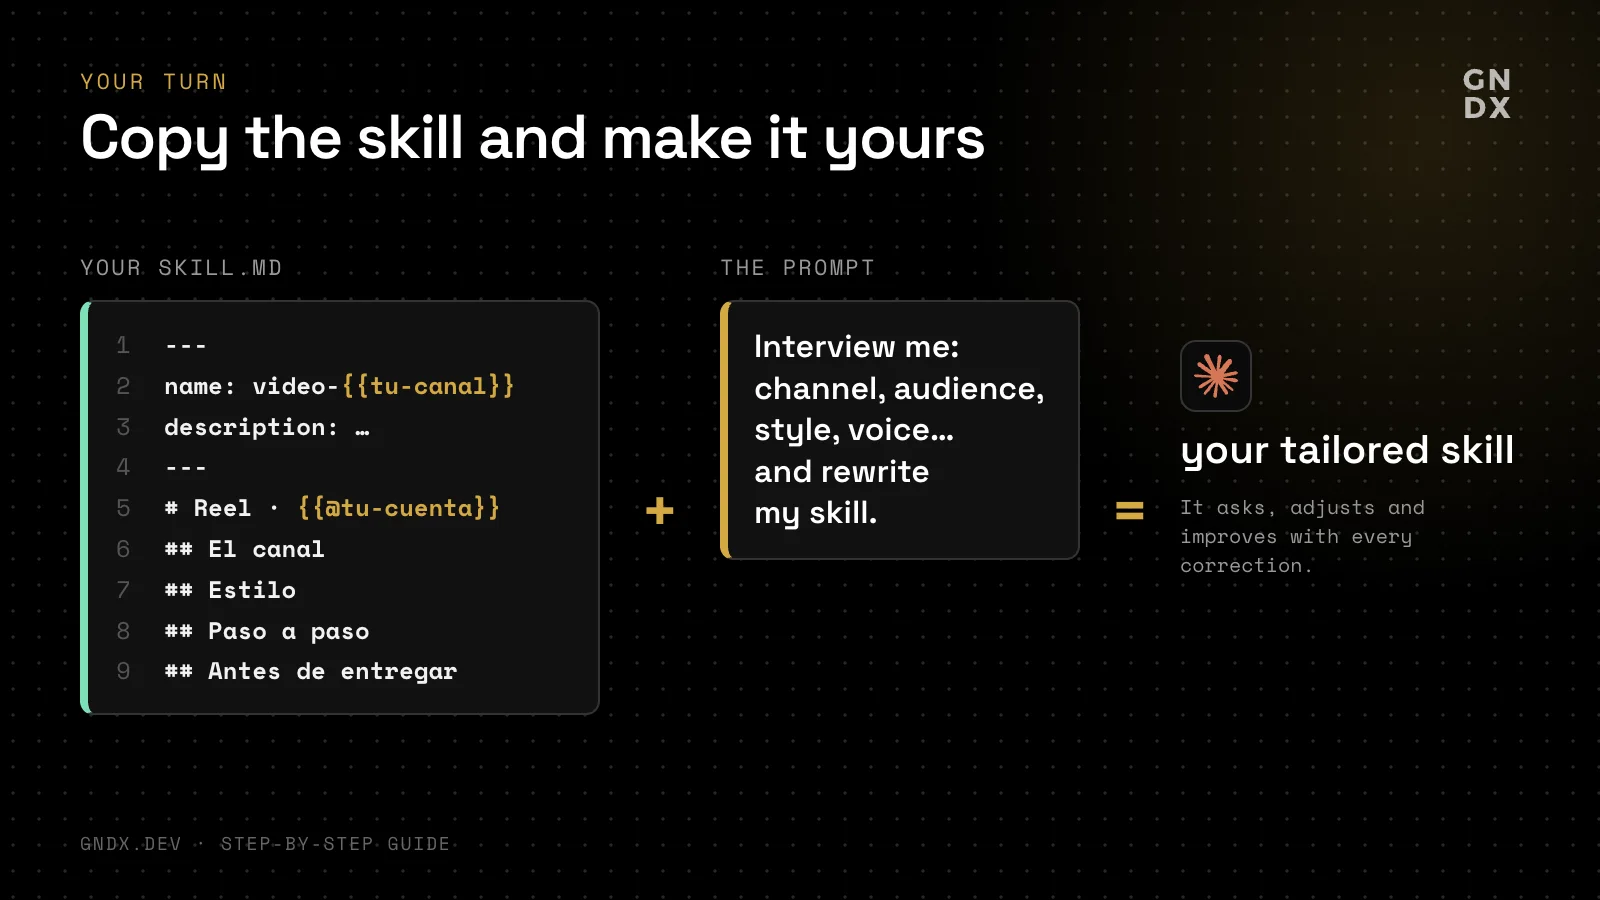
This is a generic version of my skill. Change everything between {{braces}} and save it at ~/.claude/skills/video-your-channel/SKILL.md. Then, in Claude Code, type /video-your-channel and the topic.
---
name: video-{{your-channel}}
description: Makes a vertical reel (9:16, 60 s, with voice) for {{@your-account}} about {{your topics}}, with HyperFrames, an ElevenLabs voice and a Whisper check. Use it when I ask for a reel or type /video-{{your-channel}}.
---

# Reel · {{@your-account}}

Everything lives in `{{path/to/your/project}}`. Before touching anything, read the project's `CLAUDE.md` (especially "Corrections") and load the `/hyperframes` skill.

## The channel
- Account: {{@your-account}} · Platform: {{Instagram Reels / TikTok / YouTube Shorts}}.
- Topics: {{3 to 6 topics}}. Audience: {{who you talk to}}.
- Tone: {{second person, short sentences, friendly…}}. Never: {{what you never want to see}}.
- Closing (voice and end card): "{{Follow me for more…}}" and only {{@your-account}}.

## Style
- Format: 1080 × 1920, 30 fps, 60 s.
- Colors: background {{#hex}}, accent {{#hex}} (only for what matters), text {{#hex}}. Red only for errors.
- Fonts: {{headline font}} and {{label font}}.
- {{Your platform}} safe zone: all text within x 100–980, y 222–1660 (and x ≤ 900 below y 1280). Measure it on a screenshot of a video published on your account and check it before rendering.
- Real logos and products, from their source: never redrawn.

## Data
- Primary sources only (official docs, press releases, papers). Write down the date you checked.
- Superlatives ("the first", "the most…"): cross-check them with several sources or soften them in the voiceover.
- Any code on screen has to work: test it first.

## Voice
- ElevenLabs, voice {{name or ID}} ({{premade / cloned}}), model eleven_multilingual_v2, speed {{1.1}}.
- The key goes only in the ELEVENLABS_API_KEY variable: never in a file, never printed.
- A single take: the whole script in one call (with word timestamps), then cut into sentences at the silences. Sentence by sentence sounds choppy.
- Numbers spelled out in the text that is read; digits on screen.
- Whatever the voice misreads is spelled the way it sounds ({{e.g. "F F mpeg" for FFmpeg}}); the screen shows the correct form.
- Check every sentence with Whisper (small model, language {{en}}) and again on the final mix.

## Step by step
1. Story. Hook in the first 3 seconds: a surprising question about what's on screen, with something big happening on its key word. Short promise. Chapters of 4 to 6 s that turn ("but…", "until…"). One fact with a number. A payoff that calls back to the hook. Closing. Propose 3 different stories, with a second-by-second outline and the facts already checked, and let me choose.
2. Data, with source and date, in SPEC.md.
3. Project in videos/<name>/ (each version in its own folder: -v2, -v3…). If there's a template, copy it; if not, npx hyperframes init.
4. Script: about 150 words, told with connectors, not as a list. The last sentence is the closing.
5. Voice in one take, then Whisper. Check the length: the voice ends before second 57.
6. Layers from the voice timing: word-by-word captions (at the bottom, the key word in a colored pill), chapters, notes, numbers that drop digit by digit, and stamps for wins and errors.
7. 3D world (optional, Three.js): the hero object, made real; something new on screen every ~0.2 s.
8. Sound: licensed music that ducks under the voice; one effect for each visible action, lower when it lands on the voice.
9. Review: npx hyperframes check with 0 errors and captures with the safe zone on top.
10. Preview open in the browser before rendering.
11. Render with -q delivery and measure: 1800 frames, −13 to −14 LUFS, true peak ≤ −2 dBTP, no black frames, Whisper on the mix.
12. REVIEW.md: what was measured, what wasn't, and the weakest part.
13. Corrections: every time I correct something, add it with the date to "Corrections" in CLAUDE.md before moving on and, if it applies forever, change it here too.

## Before delivery, check
- [ ] 0 errors in check and all text inside the safe zone.
- [ ] The voice ends before second 57 and the end card shows the closing.
- [ ] Facts with source and date; superlatives cross-checked.
- [ ] The key is in no file.
- [ ] Ask me to listen with headphones.The prompt to adapt it to you
Paste this into Claude Code (or your favorite AI chat) followed by your skill. It will interview you, rewrite the skill for your channel, and improve it every time you tell it what you didn’t like about a video:
You are an expert in Claude Code skills and short-form video for social media.
Below is my SKILL.md. I want to adapt it to my channel and improve it.

1. Read it all and summarize in 5 lines what it does, which tools it assumes (Claude Code, HyperFrames, ElevenLabs, Whisper, FFmpeg) and which parts are placeholders (everything between {{braces}}).
2. Interview me one question at a time (12 at most): platform and format, my account and audience, topics, tone and how I talk, my brand colors and fonts, voice (premade or cloned, speed), closing line, where I get my facts, what I never want to see, what I have installed and where my project lives.
3. With my answers, rewrite the full skill: same structure (header, The channel, Style, Data, Voice, Step by step, Before delivery), with no {{braces}} left and nothing that doesn't apply to me. Write the header description so Claude Code knows when to use it.
4. Tell me 3 risks or gaps you see (for example: my platform's safe zone, music rights, facts without sources, the API key) and how the skill covers them.
5. From now on, every time I tell you what I didn't like about a video, propose the exact change to the skill (before → after) and add it to a "Corrections" section with the date.

Don't make anything up about me: if you don't know, ask.

--- MY SKILL.md ---
(paste your skill here)
Wrapping up
What surprised me most wasn’t AI making videos: it was that the system learns from my corrections. One sentence, one skill and a log of mistakes. The rest is repeat, correct and write it down.
If you build your own version, show me: I’m @gndx on Instagram and YouTube. And if you want to see the reel that explains this guide in 60 seconds, it’s on my profile.